I will try my best to give an overview as to how we created the table but almost all the credit goes to Ana White's blog and instructions here and to Ashley at Attempts at Domestication who walked through the plans on her blog posting here. We made some mistakes but I have mentioned those below so that you can learn from them and save yourself some grief.
We adjusted the final product from Ana White's instructions to create the size we wanted. Our table ended up measuring 5' long and 37" wide.
We started out by purchasing all our wood at the Home Depot (we had a gift card from Christmas so our table came in VERY cheap!!) and politely asked if they would cut it down to size for us. They agreed which saved us a ton of time and stress.
(Not pictured) I sanded all the pieces down with 150 grit so they were nice and smooth. Then applied wood conditioner to all the pieces so the stain would go on nice and pretty and not blotchy.
Then you let it dry.
Next up: assembly!
 | |||
| Steve pre-drilled the holes for the screws on the "aprons". |
 | ||||
| All screwed together and ready for the "supports" |

First mistake: he screwed the supports in with the frame upside down because the reasoning was that it would be flush with the bottom of the frame since it was laying on the floor. So, when we flipped it over, we realized that they weren't all exactly flush. **LEARN: Screw in supports with the frame right side up so you can see what you are doing.
 |
| Legs on! Notice that we liked the chunkier look on the legs so we went with 4x4's instead of 2x4's. |

While Steve was upstairs working on the frame, I was in the basement working on the top of the table. I laid all four planks out just how I wanted them to look on the table top (taking into account any knots or unpleasant spots or whatever). Here is where I should mention that in both other blogs I was relying on, they used 1x10's for the top but when we were at Home Depot, we found 2x10's (think chunkier) which we like better so we picked those up instead for a more chunky look.
Second mistake: We should have laid the planks onto the frame first to see if they were warped or laid weird or something like that. Enter me, perfectly confident that no such thing was necessary because I had followed all the instructions to a T!!! **LEARN: Lay your planks out on your frame to make sure they aren't warped before staining!!!

This was my first piece of stained plank-top and it was beautiful.... I went ahead and stained all of them....

Back upstairs, Steve had added the support braces. Look at Copper- he was so stressed by all the banging and cafuffle that by the end of the day, he just laid down and tried not to care.
So, we brought my stained pieces upstairs (the next day) and laid them all out on the table. Enter gasping and shock... they were warped!!! There are many reasons wood can get warped and I won't go into all the options we went through (including planing all the planks which would have taken forever!!!) but I will say that we scrapped it and went with Plan B. Steve did try to sand them down so they would lie better but it was no use. They were badly warped and we were spending a lot of time and effort into something that might or might not work. **LEARN: Stick with the 1x10's!!!
Plan B was to buy new planks- not the 2x10's that we originally loved- because there would be a greater chance of them warping. So we headed to Menards (at this point we were a little leery of HD) and picked up 1x10's. Long story short- we treated and stained them (again) and then laid them onto the table to screw in. One or two of them was slightly warped after all of that but not crazy like the other ones. It was doable.I didn't really take any pictures of this process because I was tired of it and just wanted it done!

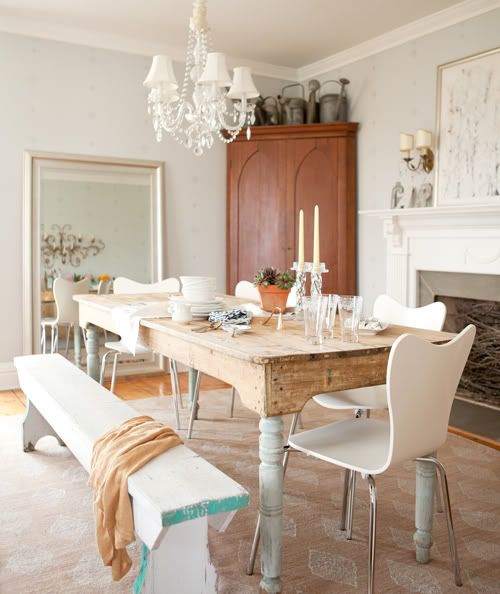
Here is the finished product, in all her glory! She is quite pretty.
We used MinWax's Dark Walnut (I did 2 coats) and I used the matte finish polyurethane (3 coats).
I had some quality Ben Moore Aura paint (color: Chantilly Lace) leftover from our kitchen makeover, so that's what I used on the bottom (after filling all the holes with wood filler and sanding smooth).
Phew. Glad it is done!


Feel free to ask questions if you have them! Hope the tutorial was helpful.
I am off to search for chairs and a bench!